From Scuba Dives to Social Media Posts
I don’t leave home without a video camera unless I forget my phone. It’s true — I have come to rely on my iPhone for capturing anything interesting I see in video, time-lapse, or slow motion.
Thanks to some solid smartphone housing options from SeaLife, ProShot, Divevolk, and others, the excitement of having video at my fingertips now extends underwater. Taking my iPhone diving gives me the convenience of immediate footage review, in-phone editing, and instant uploading to social media, all in crisp 4K (or higher) resolution. I can zoom, time-lapse, or shoot in cinematic slow-motion — not to mention being able to type something for my buddy to read on my screen during the dive if needed.
I’m a big fan of easy workflow. Compact filming gear is high on my ever-changing equipment wish list. Can I fit virtually an entire TV studio in my backpack for carry-on? Yes! Can I create very high-quality video content from it? Also yes!
Between GoPro, DJI, Insta360, OM, SeaLife Micro, and various smartphone housings, we have a wealth of options that are extremely economical compared with a DSLR and are easy for travel. Many people shoot feature films, commercials, shorts, and documentaries on smartphones, taking full advantage of their rapidly improving video quality.
Divers often seek visual evidence that we shared the water with fantastical creatures and habitats. The challenge remains getting hours of raw footage from your memory card or smartphone library into an enjoyable highlight reel for Instagram, Facebook, YouTube, TikTok, or any other platform.
The following steps will take you from getting your gear to sharing your underwater encounters with the world.
Choose Your Weapon
When deciding on a camera, do some research and choose the optimal equipment for your needs based on size, price, and feature preferences. It’s helpful to consider your likely travel plans and any airline weight restrictions you might face.
If you are like me and want to bring your entire TV studio in your carry-on luggage or backpack, it’s entirely possible. Here are some things to consider.
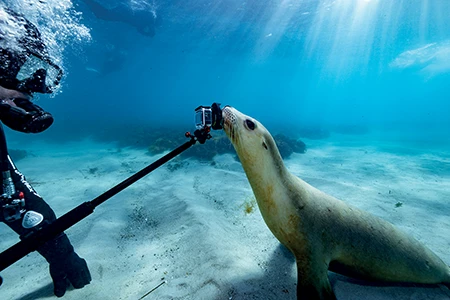
- If you never want to miss anything on a dive, a 360/VR (virtual reality) camera may be a great option. You are always in the video since VR cameras shoot everything around you in a giant sphere. If dive selfies are your jam, you’ll be covered.
- If you want a simplistic point-and-shoot camera that allows you to be present on your dive and you don’t mind a wide frame with somewhat unstable footage, then a GoPro mounted to your mask might be your winner. Just understand that you won’t get the smoothest shot as you turn your head and look around as you dive.
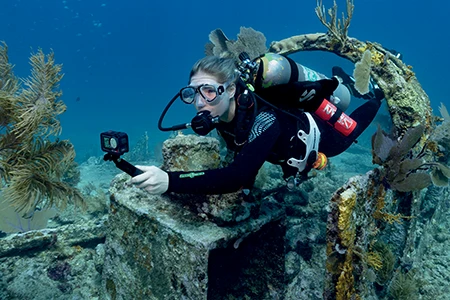
- If you want more control as you’re filming and extra capabilities such as zoom, putting your smartphone in a housing is a good choice.
- A dedicated DJI Action Camera or GoPro mounted on a tray or ball-joint mount or a selfie stick is another option for a more stable shot.
Getting to Know You
Before you go all underwater Steven Spielberg, familiarize yourself with your equipment. Explore the buttons, basic controls, and screen brightness. Decide on your settings, and manage any details so you can operate underwater without much thought. Read the manual, or watch a YouTube video about it.
Format your memory card, charge your batteries, and make sure you have cleared the space you need if you are shooting on your phone. Nobody wants to miss the creature feature on their dive because they get the dreaded “memory full” notice just when a rare megamouth shark or coelacanth swims by.
It’s a great idea to hop in the pool or the shallows with a mask and snorkel to test your new camera in confined water. Get some muscle memory with the controls, test the camera’s buoyancy, get your settings optimized, and try warm filters for color correction if you’re into that.
Fins, Buoyancy, Action Cam
After your buddy check, initial splash, and OK sign to buddies and guides, check the camera and housing for any leaks or bubbles. If everything is a go, it’s time to descend and shoot. Now that you’re in dive mode, it’s crucial to dial in your neutral buoyancy. Do not be that person who’s looking at your screen and unwittingly kicking the reef or creating sand plumes that ruin the visibility for you and everyone around you.
At one time or another we have all framed a shot and forgotten to hit record or not hit the button hard enough. For the love of your footage, look for the red indicator light to make certain you’re recording. Paying close attention will help you avoid the scenario of believing you’re filming when you’re not and not filming when you are. Reviewing your footage to discover it’s a willy-nilly shot of your fins and the reef that cuts off just as you pan up to film the whale shark cruising by is the worst experience.
Another tip is to always put handles on both ends of your shots whenever possible. You may think you don’t need it, but adding an extra 10 seconds of rolling video before you film the subject and again after it leaves the frame is worth its weight in gold in the editing phase.
While you’re filming, do your best to use your body as a stabilizer to avoid shaky, wobbly footage. Stable footage looks more professional.
As you maneuver at your dive site, try to position the sun behind you so it shines on your subject. Using the sun is especially important if you don’t have lights, unless you love silhouettes and are intentionally backlighting for dramatic effect.
The closer you are to your subject, especially if the subject comes to you, the better. Shooting closer will make the subject clearer and the colors pop more and will help you capture more detail. The wider your lens, the better for covering a large scene or, if you’re lucky, a large animal.
Footage Review
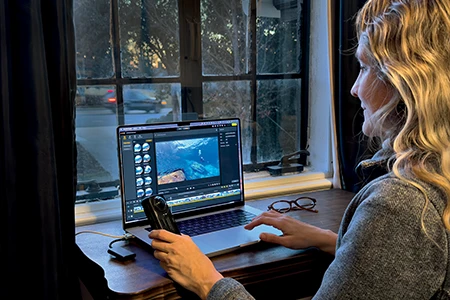
Reviewing footage is one of my favorite activities. This is where you get to drool over what you captured on your dive, mark your favorite shots, and trim or delete footage to save to a hard drive or cloud storage space.
I often sit with my camera or phone after a dive and immediately use the trim tool on each clip before I begin cutting a video in a software editing program. It gets rid of whoopsie-daisy shots and irrelevant or undesirable footage, and it immediately shows you how to improve your technique for your next dives.
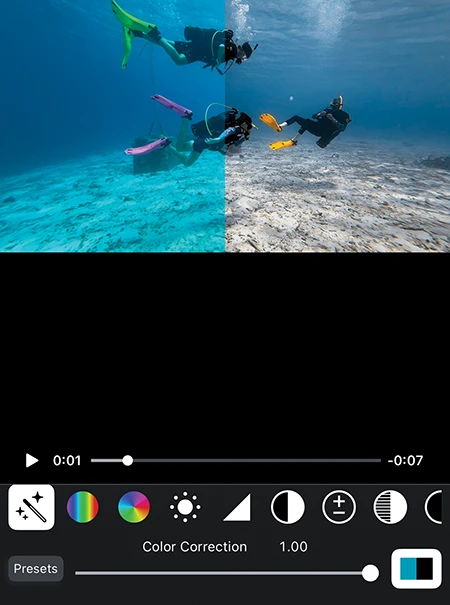
Color Me Colorful
The next step is to color-correct your footage so everything doesn’t look blue or green. Some action cameras (such as GoPro, Insta360, and others) have underwater color correction capabilities built into their editing software that will warm your footage and make all the colors shine through the ocean’s blue-indigo-violet filter.
There are also lookup tables (LUTs), which are color filters you can apply to your videos to adjust colors, contrast, hue, saturation, and more. Many underwater professionals sell their custom LUTs online. You can download them and see how they affect your footage.
It is amazing how every ocean has different colors depending on the season, time of day, weather, and visibility. One LUT might work beautifully for making your Maldives coral reef colors pop but look awful for your kelp forest footage taken at the California coast. Look for LUTs that suit your dive location and the video’s mood. They can be magical when correctly applied.
Apps such as AquaColorFix, DaVinci, and Dive+ have color grading options, but some versions may not export 4K video, so applying LUTs in your favorite editing software may be your best bet.
Choose Your Groove
The first thing I do when I’m about to create a video is select music to set the tone for my piece, whether it’s a 15-second reel for Instagram or a long-form video for YouTube. So where do you find music? If you are simply posting to your personal pages on social media, you may be able to use the provided copyrighted music through the social media platform of your choice with no issues.
If you are selling something or making a video for commercial purposes, you must use royalty-free (RF) music. There are RF options in Meta and extensive libraries such as Pond5 of great RF music that you can purchase and download a la carte.
You can also get an annual membership to a service like Artlist, Epidemic Sound, or Soundstripe. These services allow creators to license unlimited music without being flagged for copyright infringement, which can squelch your viewership or even get your account disabled.
Measure Twice, Cut Once
Now for the fun part: putting together your video! Editing impressive footage has never been easier. Once you have selected your clips, color-corrected them, and found your musical inspiration, you’re ready to find your optimal editing software. There are countless options.
Many action cameras include their own apps that let you create automatic edits, sync clips to music, or enhance your footage. GoPro Quik, Insta360 Studio, and DJI Mimo, for example, are apps that can be a one-stop shop for your editing needs.
If you want to edit on your smartphone, you can download Meta’s Edits video creation app and upload your finished product directly to your social media pages. CapCut features an exhaustive level of editing tools, from color grading to image stabilization. Both apps feature countless video templates to use for dragging and dropping your shots into a preexisting timeline and getting a finished product with little effort.
As with any app, make sure you are comfortable with its data privacy and the terms of service. If you want to edit on your desktop computer, most apps have a desktop version as well. You can also use a more robust editing tool such as Final Cut Pro or Adobe Premiere, which have many online tutorials.
Uploading Your Masterpiece
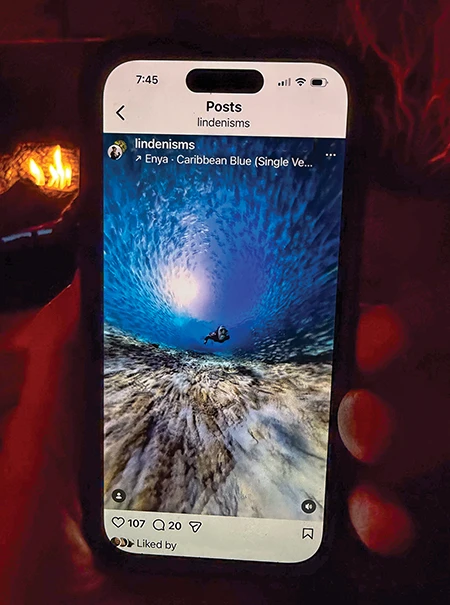
Once you have edited, tweaked, and polished your video, it’s time to export it with the appropriate settings (4K/HD is preferable) and upload it to your social media accounts. Write a compelling and fun caption, add a relevant hashtag or two if you wish, choose a thumbnail (the little image that shows on your wall or timeline before someone watches the video), and watch the likes and comments roll in from friends, family, and strangers.
The more you practice and hone your editing tools and personal style, the faster and easier it will be. Soon you will be prolific at creating successful digital scuba content.
© Alert Diver – Q1 2026