LOWER BACK PAIN is one of the most common medical complaints. Estimates are that more than 500 million individuals worldwide experience lower back pain, making it the leading cause of disability. It is important to focus on good posture, strong core muscles, healthy weight, and a balanced range of motion front to back and left to right.
A strong, pain-free back and stable core are necessary during entries and exits from the water and while carrying dive equipment on a rocking boat. Improving your overall spine health will improve stability and allow you to dive with greater efficiency for a better overall dive experience.
If you currently suffer from back pain, consult with your physician before commencing an exercise program. Exercise is generally a component of treatment and prevention. The most important tip is to listen to your body and not engage in any movement that is painful or results in symptoms such as numbness or tingling sensations.
Prevention is the best medicine, so this series of exercises is effective for all individuals with medical clearance. It will build a strong core, improve stabilizing musculature, and balance flexibility. It is important to listen to your body and gradually progress to three sets of this exercise series.
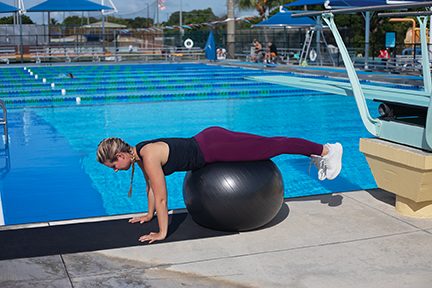
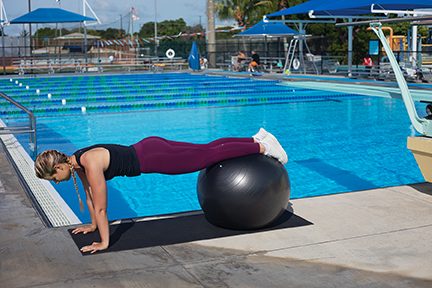
Physioball Rollout Plank
- Start on your hands in a push-up position with your waist on the physioball.
- When in control, slowly walk your hands out one at a time while keeping a push-up position until your ankles are on the physioball.
- Slowly walk your hands back toward the ball until the ball is at your waist.
- Repeat 10 times slowly.
Tip:
Keep a stable core.
Modification:
Hold the push-up position without walking your hands out, or don’t walk your hands out as far.
Challenge:
Hold for five seconds after walking your hands out before walking your hands back in.
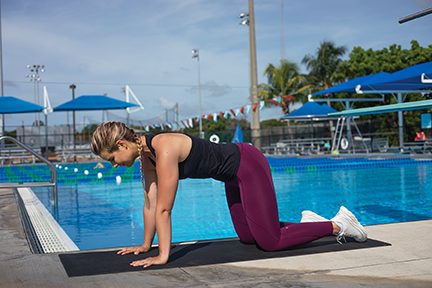
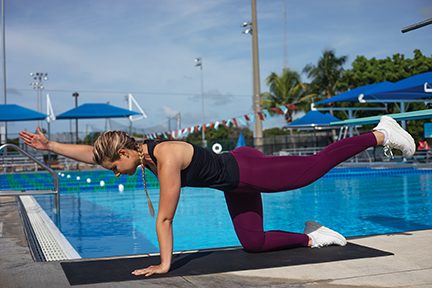
Quadruped
- Start on your hands and knees with your hands under your shoulders, knees under your hips, and back in a neutral position.
- Extend your right arm and left leg.
- Hold for two seconds before returning to the starting position.
- Now extend your left arm and right leg and hold for two seconds before returning to the starting position.
- Repeat the sequence 10 times.
Tip:
Lengthen your body, keeping your core (especially abdominal muscles) tight, and focus on a stable part of the floor.
Modification:
If you don’t feel stable enough, extend only one appendage at a time.
Challenge:
Once you are comfortable holding for two seconds, touch your knee to your elbow before returning to a starting position.
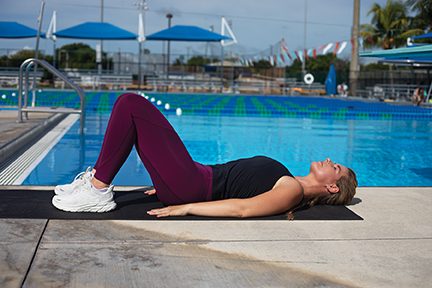
Hip Thrusts
- Start lying flat on your back with your feet under your knees, keeping your arms at your sides.
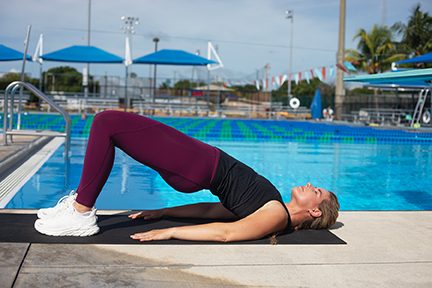
- Lift your hips while keeping your back straight.
- Hold for five seconds, and then slowly lower your hips to the floor.
- Repeat 10 times
Tip:
Push your heels through the floor, and make sure your knees are pointing forward
Modification:
Hold for as long as you feel comfortable.
Challenge:
Hold the raised position for up to 10 seconds before returning to the floor.
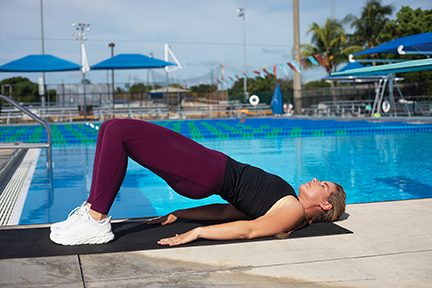
Bridge with Hip Flexion
- Start flat on your back with your feet under your knees, keeping your arms at your sides.
- Lift your hips while keeping your back straight.
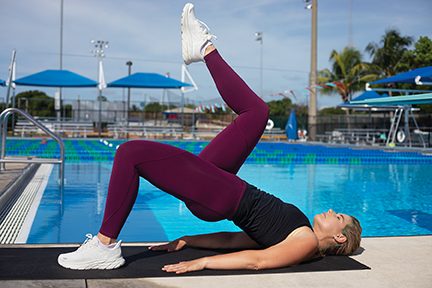
- Slowly lift your right leg, keeping it bent at 90 degrees. Stop if you feel any lower back strain.
- Lower your leg and repeat with your left leg while maintaining a bridge position.
- Repeat the sequence 10 times.
Tip:
Don’t arch your back.
Modification:
Place a block under your lower back.
Challenge:
Hold your leg in the raised position.
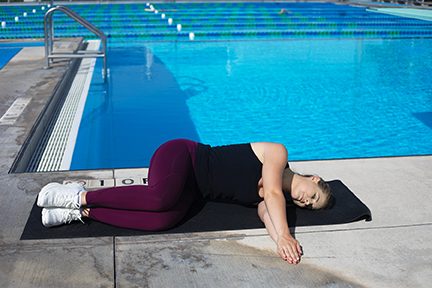
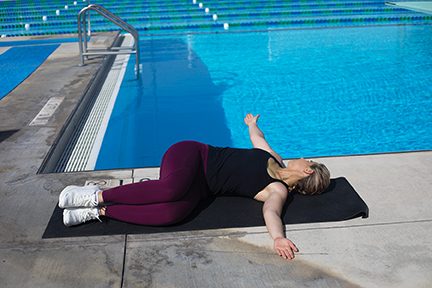
T-Spine Stretch
- Start lying on your right side with your arms straight in front of you and your left leg on top of your right, bent at 90 degrees.
- Slowly twist your upper body and bring your arm over without moving your legs.
- Hold for five seconds, looking at your left hand the entire time, then return to the starting position.
- Repeat 10 times, and then switch to the left side.
Tip:
Consider a soft surface such as a carpet or yoga mat.
Modification:
Let your knees come up as much as necessary.
Challenge:
Instead of having your knees stacked, raise your top knee to touch the floor.
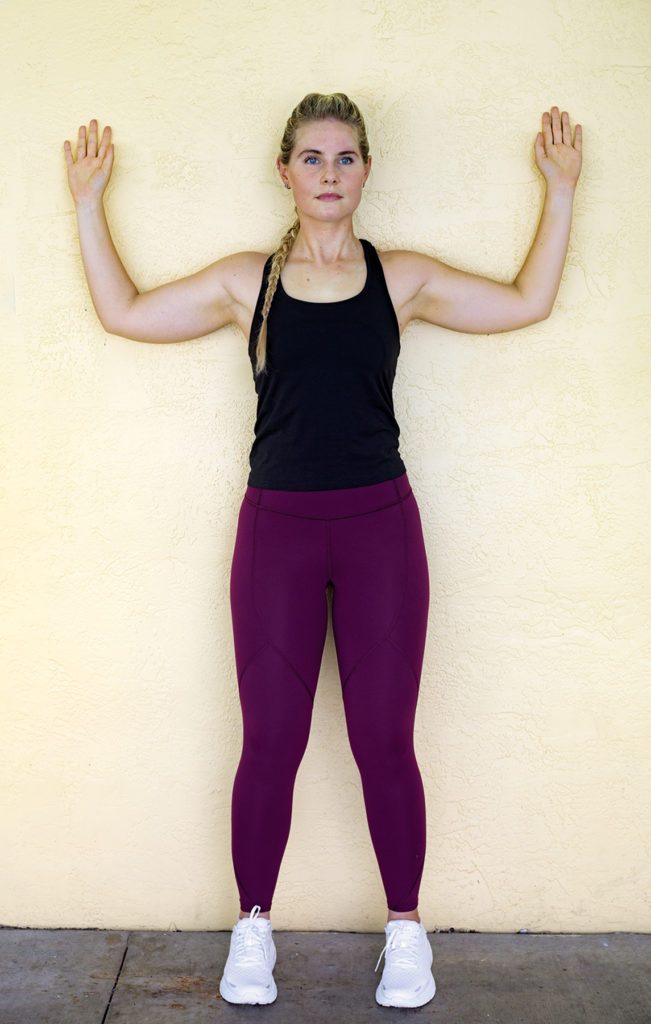
Wall Angels
1. Start with your back facing the wall and your feet about a foot from the wall and shoulder-width apart with a slight bend in your knees.
2. Put your arms against the wall with your elbows bent at 90 degrees and in line with your shoulders.
3. Keep your back flat against the wall and straighten your arms, sliding them along the wall.
4. Lower your arms back to the starting position.
5. Repeat 10 times.
Tip:
Keep your back flat, and push your lower back against the wall.
Modification:
Don’t put your arms and elbows firmly against the wall.
Challenge:
Hold your arms for five seconds at the top.

NOTE: To avoid an increased risk of decompression sickness, DAN® recommends that divers avoid strenuous exercise for 24 hours after making a dive. During your annual physical exam or following any changes in your health status, consult your physician to ensure you have medical clearance to dive.
© Alert Diver — Q3 2022