DIVE FITNESS
YOGA KEEPS YOU YOUNG, at least from a physiological perspective. Regular yoga practice can counter the effects of aging by regularly moving joints through a full range of motion, improving strength and balance, and reducing stress.
Improved range of motion helps with donning gear, and increased strength allows you to gather your equipment and move more easily through the water. Yoga practitioners also experience a calming effect from reduced circulating stress hormones.
Repeat each exercise below three to five times before progressing to the next. Complete the series at least three days per week. It will take only about 15 minutes, which is a small investment you won’t regret.
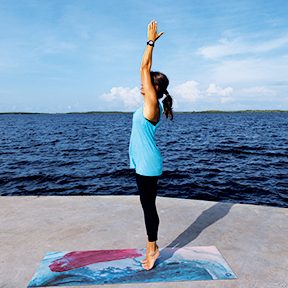
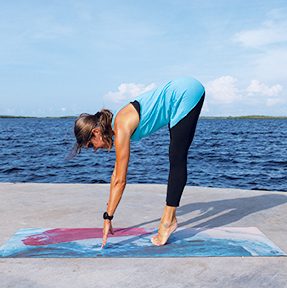
Diver’s Pose
This pose improves overall posture, stretches hamstrings, strengthens back and core muscles, works feet and ankles, and improves balance and proprioception (awareness of the body in space).
- Stand upright and tall.
- Raise your arms overhead, and lift your heels off the ground.
- Slowly hinge from the hips and bend forward into a diving posture, keeping your core engaged and your thighs activated.
- Lower your heels to the ground, and take a few breaths in your forward bend.
- Sweep your arms up, and return to standing.
Tip:
Maintain a slight knee bend, and keep your chest up throughout the dive.
Modification:
Keep your heels on the ground.
Challenge:
Hold the dive position for 10 to 30 seconds.
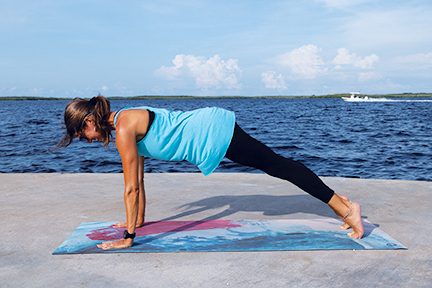
Plank
Planks improve core, shoulder, and back stability.
- Position yourself on all fours, aligning your wrists under your shoulders and grounding your palms.
- Step one leg back at a time into a push-up position.
- Drive back through your heels, and keep your body in a straight line.
- Engage your core, pulling your abdominals toward your spine.
- Keep your thighs engaged, and lengthen your tailbone toward your heels.
- Hold this position for 30 seconds, working up to one minute.
Tip:
Focus on maintaining a tight core and not letting your back sag.Modification:
Do the pose on your knees with a mat, pillow, or towel under them for comfort. If it is uncomfortable for your wrists, support your body on your forearms.Challenge:
Hold the position longer, working up to three minutes.
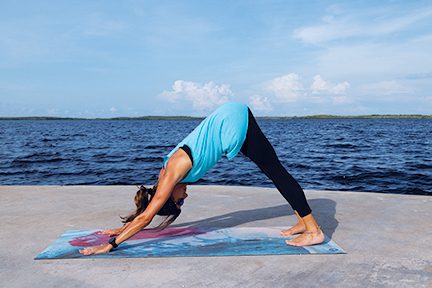
Downward Dog
This position stretches hands, shoulders, hamstrings, calves, and foot arches and strengthens arms, legs, and back.
- From a prone position, press the tops of your feet into the ground,
- From all fours, spread your fingers wide, and walk your hands forward about a palm’s width.
- Keep your knees under your hips, curl your toes under, and push your hips up and back into an upside-down V position.
- Feel as if you are pressing away the ground and lifting into your shoulders.
- Take your waist back, and reach your sitting bones (bottom of your pelvis) toward the sky.
- Feel the stretch down the back of your legs as you press your heels toward the ground.
- Hold for five to eight steady breaths.
Tip:
You should feel tension in your muscles but no discomfort in your spine.Modification:
Only slightly lift your chest, or perform using your forearms for support.Challenge:
Lift yourself higher and hold longer.
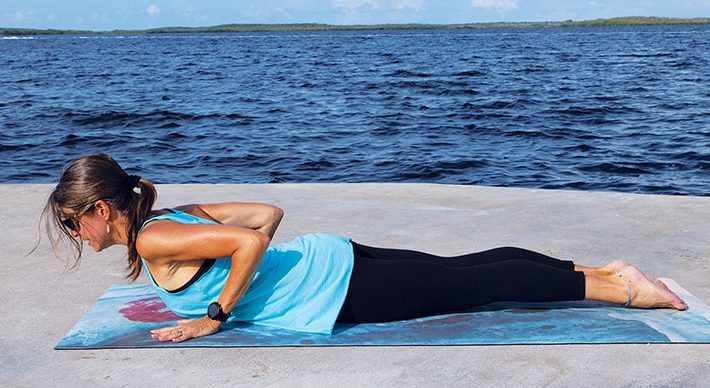
Cobra
This position opens the shoulder blades, neck, collarbones, and lungs. It reduces back pain, improves circulation, and helps spinal posture, flexibility, and alignment.
- From a prone position, press the tops of your feet into the ground, and place your palms on the ground alongside your chest with elbows pointing up, not out.
- Engage your legs, and root your hips to the ground.
- Roll back your shoulders, and lift your chest away from the ground.
- Keep your core activated to protect your lower back, relax your shoulders, and breathe deeply.
- Lift yourself only as far as you feel comfortable.
- Hold for up to 30 seconds.
Tip:
You should feel tension in your muscles but no discomfort in your spine.Modification:
Only slightly lift your chest, or perform using your forearms for support.Challenge:
Lift yourself higher and hold longer.

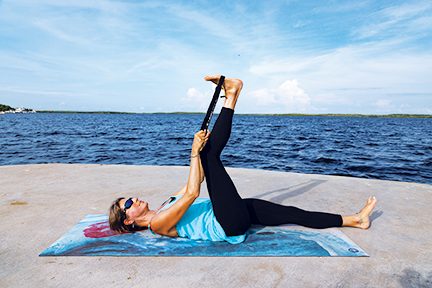
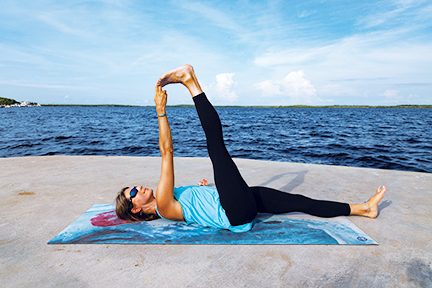
Reclining Big Toe Pose
This movement relaxes the calf and thigh muscles and frees the pelvis and spine. It strengthens knees and relieves back pain and calf cramping.
- Lie on your back, legs extended, with your feet flexed and pressing out through your heels.
- Draw your right knee to your chest, and grip your right foot arch or big toe with your right hand.
- Extend your right leg to the ceiling, keeping a soft bend in the back of the knee. Straighten your arms, but keep both shoulders on the mat.
- Keep your left leg engaged, and press down the top of your left thigh with your left hand. Extend through your right heel, creating a comfortable stretch in your hamstrings.
- Stay for five to 10 breaths, and then repeat on the other side.
Tip:
Try to keep one thigh touching the floor.Modification:
If you can’t reach around your foot or toe with your leg extended, use a strap, towel, or belt.Challenge:
Hold the position for a longer time.
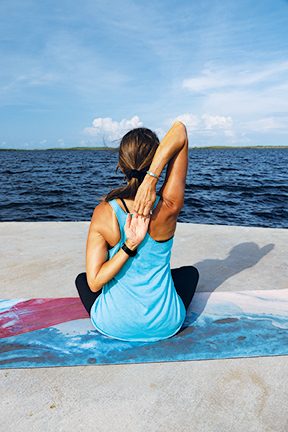
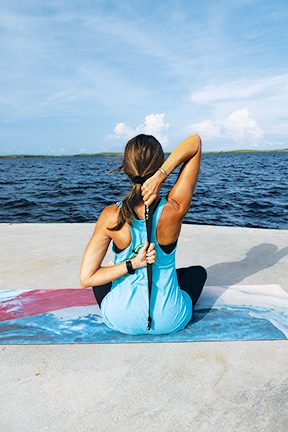
Cow’s Face
This pose improves shoulder mobility.
- From a comfortable seated position, sit tall, lengthening your spine.
- Reach your right arm up, and allow your right fingertips to drop toward the nape of your neck, keeping your right elbow up.
- Hold your left arm out to the side and rotate it so your thumb points down and your palm faces back.
- Bend your left elbow and bring it behind you, reaching for your mid back.
- Crawl both hands toward one another, aiming to meet.
- Stay for five to 10 slow breaths, and then switch sides.
Tip:
It is common to have a smaller range of motion on one side, so hold that side for a few extra breaths.Modification:
If you cannot clasp your hands, grab onto your shirt or use a strap, belt, or towel. ADChallenge:
Take bigger steps to the side of the bar.
NOTE: To avoid an increased risk of decompression sickness, DAN® recommends that divers avoid strenuous exercise for 24 hours after making a dive. During your annual physical exam or following any changes in your health status, consult your physician to ensure you have medical clearance to dive.
© Alert Diver — Q3 2023