Turbid water can be a challenging environment for underwater photographers, particularly when shooting wide angle. In Southern California, where the water quality is predictably poor, many shooters completely shy away from wide angle and instead rely on macro. It’s one thing to be on a day boat or to be able to quickly change lenses, but what happens when we take a long-range trip and find the water quality is worse than anticipated? While we can use a macro lens for some images, it is difficult to capture a tropical reef’s full beauty without a wide-angle lens.
Turbid water may not appear brown or green from the surface — in many cases the water looks entirely different once we drop in and begin the dive. All water is turbid to some degree. Understanding what causes turbidity and knowing how to work around it can make a world of difference when shooting in those conditions.
A gamut of environmental reasons — such as rain, runoff, pollution or algae blooms — can increase turbidity. Some factors are more seasonal and predictable, while others are more difficult to explain. Afternoon or evening rainfalls are common in tropical areas. These sporadic showers can create a layer of fresh water near the surface, resulting in a halocline effect that pushes natural sediment and salt water downward in the water column, where water temperatures cause further separation into suspended, visible layers. Sudden temperature changes and visible haze often mark thermoclines. Haziness can be as prevalent in the open ocean as near the shore, where runoff from local mountains or riverbeds adds sediment to the water.
Pollutants, dust and other environmental factors can create haze both topside and underwater. As one of the worst side effects of turbid water, haze prevents sunlight from penetrating through the water column and filters the color quality of the light that does get through, decreasing vibrance and contrast, an effect that happens even when the water appears clean.
One of the best skills a photographer can develop, particularly for shooting wide angle, is learning how to read water quality. Look horizontally through the water column to scan for floating or suspended particulate, haze, layers, sediment and cloudy water. Once you can assess the water, you can adjust to the situation by altering your shooting and lighting techniques.
Strobe Position
When shooting wide angle in turbid water, avoiding backscatter will be one of the main challenges. Position your strobes approximately 3 feet apart at the 10 o’clock and 2 o’clock positions with the strobe heads behind the lens port. Use your housing’s arm handles as references when aligning your strobes, and make this your “jump position,” or reset point. Strobe placement will require some trial and error, but using a strong reference point for positioning will help shorten the learning curve.
Quickly and carefully review your images underwater to check for flaring and backscatter on the sides of the frame. Zoom in, check each side of your image, and then adjust. If you see backscatter, move your strobes further behind the handles or point the strobe heads slightly outward while remaining at the 10 o’clock and 2 o’clock positions. Make sure not to flash the water column with your strobes when making adjustments. You may also need to tip your strobe heads slightly downward to keep the water column as free from backscatter as possible.
Getting closer to your subject is also a great way to restore natural contrast in hazy conditions. The old rule is, “If you think you’re close enough, get closer.”
Shooting with open apertures such as f/8 to f/13 allows more light into the foreground and assists in blending particulate into the image when not illuminated by strobe flash. An aperture of f/14 or smaller will darken the image and could reveal more particulate and backscatter in the frame. When forced to shoot through a lot of water where strobes will be ineffective, try turning off your strobes, increasing your ISO setting, adjusting your shutter speed and working your white balance in postproduction.
Your main tools to combat turbid water are proximity to your subject, lighting, framing and composition. Wet and conversion lenses are also an excellent option. Be sure to review your images often.
Proximity To Your Subject
Getting closer to your subject will help illuminate it with greater intensity and vibrance. Adjust your strobes, and watch for flaring on the sides of the frame. Try not to unnecessarily flash the open water or the background, and resist the urge to light your model.
Lighting
Light the foreground, and let Mother Nature do the rest. You can’t light the entire reef, so pick an area, preferably colorful, and illuminate that part well. Having a well-lit foreground with a dark background on a sunny day doesn’t make photographic sense, so try to avoid that by letting in more light. Adjust your ISO and shutter speeds to allow more light into the frame, and blend the light from the background with the foreground strobe flash. Keeping the sun at your back is also effective. A vibrant foreground enhances the entire image.
Framing and Composition
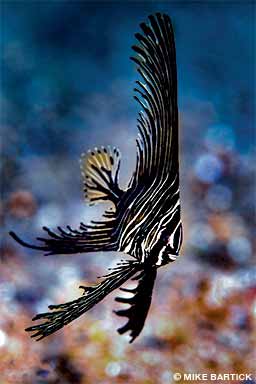
Try filling the frame with structure and color using keyhole compositions or weighting your composition to one side of the frame while lighting with a single strobe. If you are shooting sea fans, a looming frogfish or an odd sponge on a wall, try using a single strobe exclusively on that side of the frame.
Conversion and Wet Lenses
Conversion lenses and wet lenses are great alternatives for shooters using digital single-lens reflex (DSLR), mirrorless and compact cameras. For DSLR and full-frame mirrorless shooters, conversion lenses transform a 60mm macro lens to approximately 22mm. Wet lenses use a standard diopter flip adapter, which allows you to flip the lens into place anytime during the dive. Bayonet-style, wet wide-angle lenses for compact cameras will convert the field of view to wide. In turbid environments, you need to work close to your subject regardless of its size. The versatility of both macro and wide-angle with wet conversion lenses is a good option.
Reviewing Your Images
Review your images often while underwater. Check the sides of the frame for flaring, and zoom in to check the open-water portions of the frame for backscatter. The LCD’s pixels are highly condensed, so everything may look perfect until you zoom in.
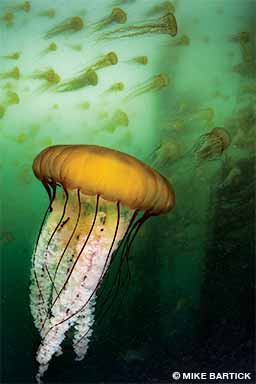
The lovely green water off Monterey, California, can be thick with particulate and haze and often lacks ambient light. When shooting there, concentrate on the foreground, let any ambient light take care of the background, and keep your compositions small. Using ambient light might require slow shutter speeds, so stabilize the camera.
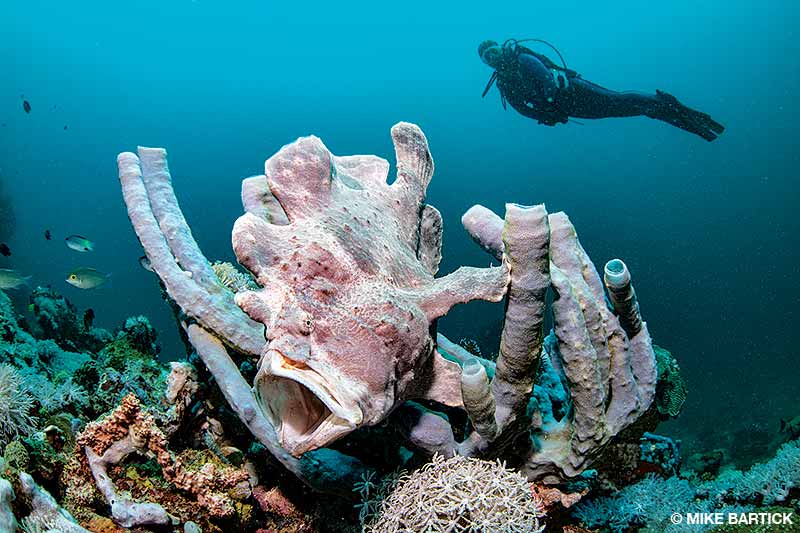
On a dream trip to Papua New Guinea, I was shocked to find very hazy water. Water runs off the lush mountain peaks directly into the ocean during the rainy season. Lack of water movement leaves the particulate suspended for a long time. We arrived in November, which was months after the rainy season, expecting clean, clear water, but it was murky in many areas. The large particles had long settled, but fine sediment was still suspended in the water column. Instead of battling against the haze, try to use it creatively in the image’s design.

Avoid backscatter by using keyhole compositions, such as framing a diver through a wreck’s porthole or a hole in a sea fan. Weighting your scene to one side of the frame will also allow for using a single strobe while providing for negative space and natural light.
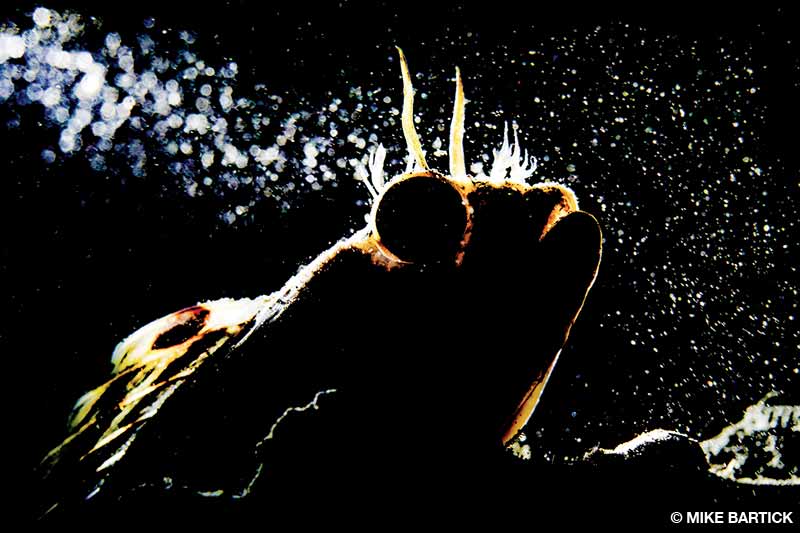
When turbid water forces you to shoot macro, it’s hard to beat a 60mm lens. For best results, keep the frame bright, your strobes positioned high and the aperture open. Use a steady light instead of strobes, and close down the aperture to allow the particulate to intensify the image design.
A 60mm lens with a conversion lens for close-focus, wide-angle scenes will allow you to focus extremely close to the lens port while maintaining a wider angle of view. The shallow depth of field also assists with creating better images in hazy water.
Postproduction
Postproduction editing allows you to adjust and clean some of the backscatter in your images. I use Adobe Photoshop for removing the stubborn specks and blobs with the spot-healing brush and proximity match option.
Shifting from color to black and white can also be highly effective for images that are monotone or severely lacking contrast and can add a dramatic or dated feel. Sharks and wrecks are my favorite subjects for black and white images. Many postproduction tools allow you to eliminate much of the backscatter in a photo. With careful lighting and consideration of your subject matter, however, it might not be necessary.
Shooting in turbid water can be one of the toughest challenges for an underwater photographer. Try to meet that challenge by using a bit of creativity and some of the techniques discussed. Learn how to read the water quality, keep your mind focused on problem-solving, and push yourself to develop strong and intuitive photography skills.
© Alert Diver — Q2 2021